Get a Call from your own Cell Phone number
Showing posts with label Working tricks. Show all posts
Showing posts with label Working tricks. Show all posts
Get a Call from your own Cell Phone number
Close All Programs With One Click
Close All Open Programs With One Click : Close All

You are in front of your office PC having 20-30 windows open and
everything messed up… You are called for an emergency… Urghh…What to do now?? Use Close All.
This tiny tool helps you to close all running applications with one click. It does not use system resources because it only flashes a “close” signal to all open windows on the desktop and then ceases. Just place a shortcut to the tool in the Start Menu, Quick Launch or elsewhere.
You can always add a hotkey to this shortcut. It is really very handy if you are running ~20 applications and want them all to quit instantly. It works just as if you were pressing the close button for each application.
How to Hide Drives Using Command Prompt(cmd) in window 7,Xp,Vista
How to Hide Drives Using Command Prompt(cmd) in window 7,Xp,Vista

If you have sensitive or important data stored on a particular disk drive that you don’t want anyone to see, a great way to hide it is to remove the drive letterassigned to a particular mounted volume. With Windows XP, you can achieve this easily using nothing more than the Command Prompt. Here's how:
Click Start -> Run (This brings up the Run dialog box)
Type cmd and press Enter (This brings up the Windows Command Prompt
Type diskpart in the command prompt and press Enter (This launches the Diskpart utility within the Command Prompt window)
Now type list volume (This displays a list of all mounted volumes on your computer and their associated drive letters) Using the above picture as reference, if, for example, you would like to hide drive R
Type select volume 1 (or select any other volume as where the drive is present)
Now type remove letter R (Note: This sometime requires a reboot)
Diskpart will now remove the drive letter.
The drive will no longer be available via Windows Explorer or My Computer.
Don’t worry though, your data remains safe!
Unhide
Now, should you want to unhide the drive and make it accessible again, just repeat the above process. But instead of typing remove letter R, type assign letter R
Click Start -> Run (This brings up the Run dialog box)
Type cmd and press Enter (This brings up the Windows Command Prompt
Type diskpart in the command prompt and press Enter (This launches the Diskpart utility within the Command Prompt window)
Now type list volume (This displays a list of all mounted volumes on your computer and their associated drive letters)
Type select volume 1 (or select any other volume as where the drive was present)
Now type assign letter R (Note: This sometime requires a reboot) The drive will be available via Windows Explorer or My Computer.
Video Demonstration of How To Hide Drives

 |
How to Change Start Button Text to Your Text Some Time we want's that start button name in our window xp should be changed to our name or any other name. There are simple Steps to do it, But first take backup of explorer.exe Open --> My computer and Then as under.. C:\Windows\explorer.exe , Copy explorer.exe and Save it at some other place. Follow Steps As Under to change start button name:-
|
|
Added by :Deepak Sharma Date:16-08-2012 |
*It is only for the Educational purposes,don't Misuse It. Even Moderator of this site nor Hosting provider is responsible for the misuse done by you. |
How to Disable Right Click in Blogger Blogs
Now why will anyone want to disable the right click in their website,Well there can be many reasons but the main reason which comes to anyone's mind is the content copying and the page source viewing well there are many another ways to view the source or copy content as you can see on my website I had also applied this script earlier which disables the right click on website but recently I just removed this script as many people were having problems.
So you can check out the steps below for disabling right click on Blogger Blogs and protecting your content from being copied.
1. Go to your dashboard in Blogger.com
2. Now click Template and than click Edit HTML now click on Proceed.
3. Now simply copy and paste the below script and paste it right above the </body> tag.
3. Now simply copy and paste the below script and paste it right above the </body> tag.
<script language=javascript>
<!--
var message="";function clickIE()
{
if (document.all) {
(message);return false;}
}function clickNS(e)
{
if (document.layers||(document.getElementById&&!document.all)) {
if (e.which==2||e.which==3) {(message);return false;}}
}if (document.layers){
document.captureEvents(Event.MOUSEDOWN);document.onmousedown=clickNS;}
else{
document.onmouseup=clickNS;document.oncontextmenu=clickIE;}
document.oncontextmenu=new Function("return false")// -->
</script>
4. That’s it now click on Save Template Button, now script is up and running on your blog just check it out refresh your blog and try to right click you will not be able to do that, ask your readers to do this thing.
HTML Editor for Designing and Previewing your CSS Widgets
If you are a big fan of CSS and love to create and design widgets for your blog using CSS than you would be happy to know than we have launched a new editor page on our website which allow you to design and preview your widgets. With this easy and fast editor you can just add your CSS code and your HTML and than hit the preview button too the widget rendered on the right hand side.

So as you can see in the above image I just added the CSS and HTML for my search widget and it rendered perfectly on right hand side. So sometimes it might give some padding and margin problems but in reality the widget will work superb.
You can start using this tool from our HTML Editor Page, so have fun designing your widgets. If you find any problems using this tool please comment below so that I can fix it up.
How to Reset Firefox’s Forgotten Master Password Easily
Master Password is a way to add another layer of security to your locally saved usernames and passwords. Whenever you forgot your username or password for a specific account, you can check that username by going to the tools but now you have to enter the master password for gaining access to those usernames and passwords.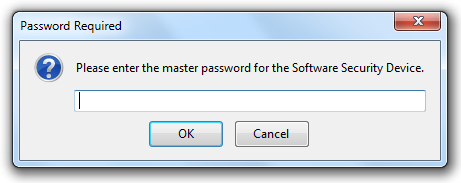
REMEMBER Resetting your master password will remove all the usernames and password saved

Now in some cases you might forget your master password and loose control to your database, well in that case firefox officially provides a simple and easy way for resetting your master password and choosing another good password.
locally for security reasons.
Resetting Master Password :
1. Open Firefox and in the address bar enter the below location and press enter.
chrome://pippki/content/resetpassword.xul
2. Now you will see the reset password page like below, no click on the reset button.
3. That’s it now your master password will get reset and you can choose another good password.
How to Undo Sent Email Message in Gmail Using Labs Feature

Emails are widely used everywhere, every business deal is simply texted to other person and then its again relied by the medium of email, so when ever something important is texted than its really important to check the mail before we click the send button, as it can make out something else if we simply punch some wrong words. So do we have any alternate to Undo an email if its accidently send by us.
Well if you are on Gmail the answer is Yes, well its not like you will simply go to any of your past email you send before and now you will Undo that but its gonna apply to the emails which will be sent now after installing Undo Send feature from their Labs, check full steps below.
1. Navigate to your Gmail Settings : So the first step is to visit your Mail settings which you can access by clicking that small Gear icon and than choosing Settings.


3. Now Search for "Undo Send" : Now simply make a search for “Undo Send” which is a simple Gmail Beta Plugin which will do all the wonders, now as soon as you Enable it and click on Save your Gmail will load again so that that plugin could be brought in action.

4. Now Compose, Send and Check : Now its time to see this extension in action, simply compose another email or reply to anyone else, type your message and than click on Send now you will see message send and small Undo Option to get that email back, click that and you email will be backed up in Drafts fro future use.

So now you have a perfect plugin for perfect emails when ever your emails get wrong just click that Undo Button and Voila ! emails back, have fun and do share this post if you like it
5 Brilliant Tips to Increase your Mobile Internet Speed
 Mobile internet these days is the main source for the teenagers for staying updated on social networks, sometimes Internet gets slow or even gets disconnected that stage is really freaky insane and it pisses everyone off.
So today we are going to see some steps which will boost your mobile internet connectivity and hence gain some more speed.
- Well the first point is obvious find some near Hotspot and use their internet as its fast and more active. As they are connected to a broadband which they are simply distributing through Wi-Fi so you can take advantage of that thing and enjoy faster speeds.
- Breaking all the Bonds, using mobile internet or EDGE in a congested room entirely covered with walls and think plates can cause decrease in mobile internet service so better to use it in open without any walls or anything.
- Using mobile internet in Off Peak hours can seriously boost up the speed because the using traffic is really low the times which is suitable for this thing is @ night, so try to use it in night as it can really help you out.
- Updating your Mobile Firmware can get new settings or mods for your phone which can rapidly increase speed and gain more connectivity so every month always check that if there are any updates for your phone.
- Well the last thing can cost you some BUCKS but may show you some increase in your speed is that purchase booster i.e. antenna which can rapidly capture more signals and gain more connectivity so you can try this one if you find one.
How to Recover Data from a Dead Hard Drive Easily
You might be using a good memory hard drive for storing out your important data, movies, office files and many other stuff, but many times it happens that your hard drive gets corrupted in form of its life going to be end, well if that’s the case and you have left with some last minutes for recovering your data before it simply goes black out than we have a simple freezing out idea which will surely help you in recovering your data from your dead hard drive.

Freezing your hard drive surely increases its lifetime but you do not have to freeze it and than attach it but the trick you are going to use here is to putting your hard drive in a leak free water bag obviously without any water in it and than keeping it in the refrigerator with cables attached and than starting your recovery process this will increase your maximum time for recovery process.
Hopefully this will allow you to recover all your data from your hard drive and transfer it successfully to your new drive. Via - hacknmod
HOW to Unlock Password Protected Memory Cards Without Formatting
Memory Cards are the external storage media that are used to store digital information. Most of the users store music, videos and photos in the memory cards. But some experienced users also stores confidential information, contacts, messages etc in it and sets up the password to protect it from unauthorized access. However if you forget your password then recovering your data can be a nightmare for most users. Even mobile companies don’t provide any software to remove password protection. If you connect the password protected memory card with your computer using USB then it will not show any extra hard drive in your Windows Explorer. The only solution left is to Format the memory card from your mobile phones.
FExplorer
is freeware third party small utility which will bring sigh of relief to users who forgot their memory card password. FExplorer only works with Nokia s60 first and second Edition phones
FExplorer
is freeware third party small utility which will bring sigh of relief to users who forgot their memory card password. FExplorer only works with Nokia s60 first and second Edition phones
How to Unlock Password Protected Memory Cards Without Formatting
§ ==> First of all, Download FExplorer in to your mobile phone.
§ ==> Now run FExplorer and go to C: drive first.
§ ==> Now get into C:\System folder.

§ ==> Now open this file with Notepad in your computer.
§ ==> Now you will be able to see the memory card password in this notepad file.
That’s it! Yet there is no such method to unlock memory card password of latest Nokia s60 series, E-series and N-series mobile phones without formatting. If you have any solution for these mobiles please feel free to mention in comments.
Subscribe to:
Posts (Atom)


